


Audience: manage your people
The Audience section of Admin is where you view and manage everyone connected to your church — search for members, see their activity, organize them with tags, and manage campuses and communities.
How it works
Open Admin and click the Audience tab in the left navigation. The section is organized into tabs:
| Tab | What it's for |
|---|---|
| People | Every person record for your church — searchable and filterable |
| Suggested Follows | The people Apollos suggests members follow |
| Push Notifications | Send a broadcast push — see Push notifications & messaging |
| Communities | Your church's groups and communities |
| Campuses | Your campus list and which campuses appear in the app |
| Tags | Labels used to segment your audience for personalized content |
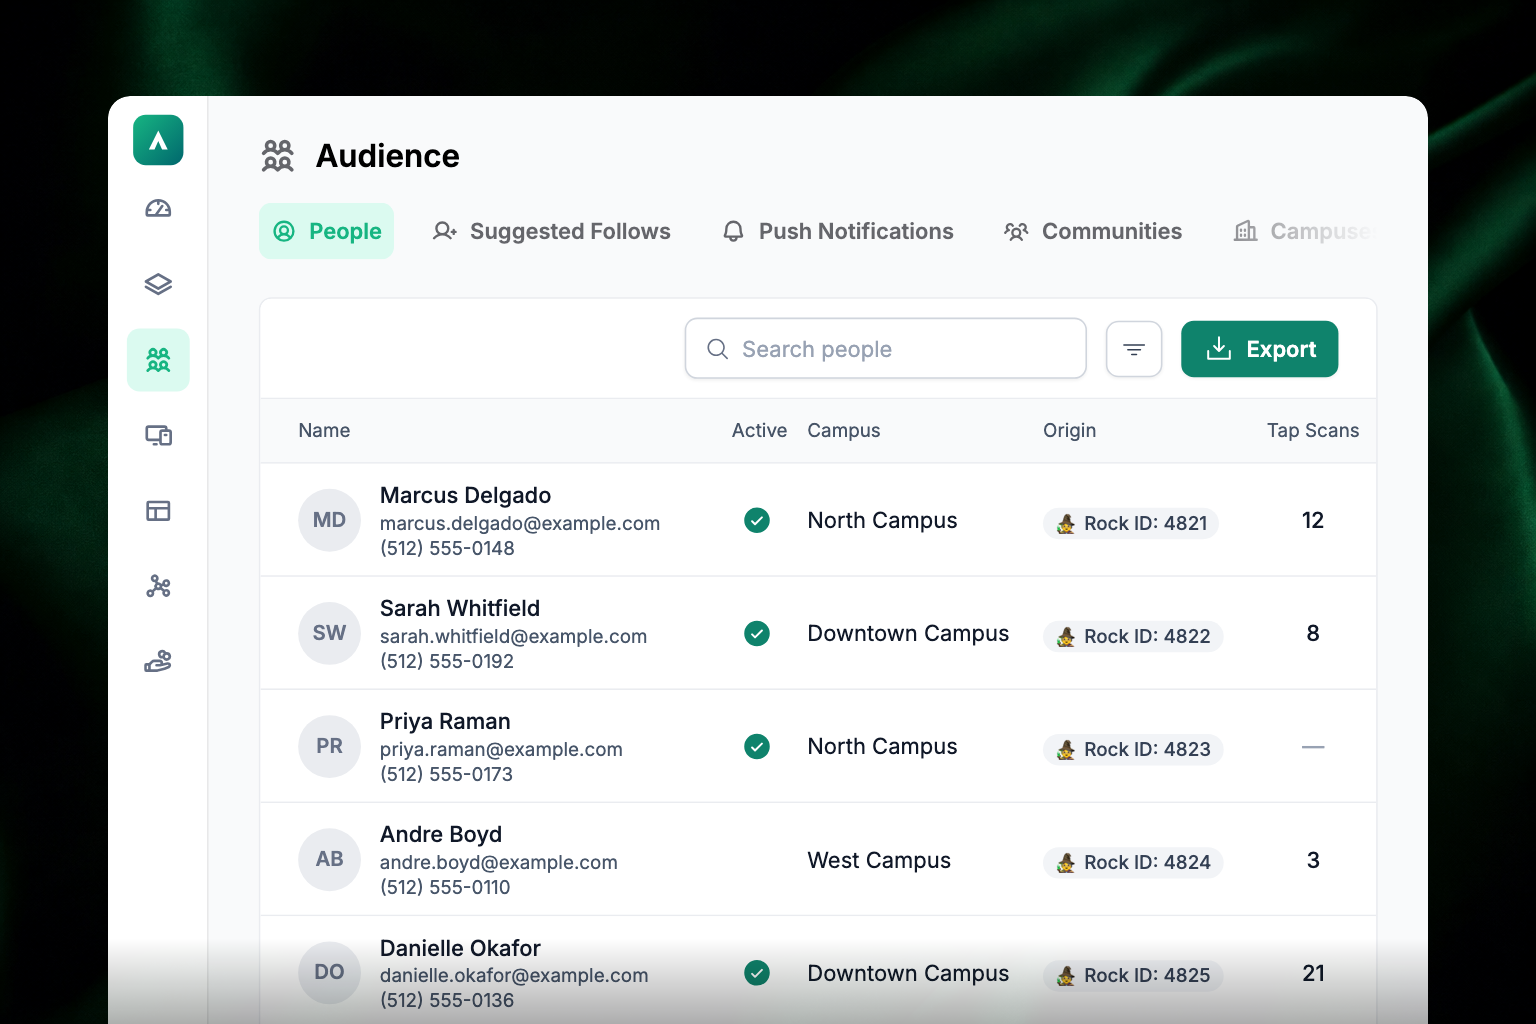
People records come from two places: your church management system (Rock, Planning Center, or CCB) and members who sign up directly in the app. Each record shows where it originated, so you can always tell whether a person was synced from your ChMS or created in Apollos.
Push Notifications is the one tab that isn't on for every church. If you don't see it, ask your Apollos contact.
Find a person
- Open Audience > People.
- Type a name, email address, or phone number into the search bar.
- The list updates as you type. You can search by first name, last name, or both — "Jordan Furdock" finds the right person even if you type the names in either order.
Each row shows the person's photo, name, email, phone number, campus, and where their record came from (Rock, Planning Center, CCB, or Apollos). Contact details only appear if the person has shared them — someone who signed up with just a phone number won't show an email.
Filter the people list
Click the funnel icon to the right of the search bar to open the filter panel. There are four filters:
- Lists — show only people with a specific tag (your audience segments).
- Campuses — show only people assigned to one campus.
- User Status — show only people who have actually signed in to the app, as opposed to every record synced from your ChMS.
- Tap Activity — show people who have scanned a tag, never scanned, scanned recently (last 7/30/90 days), or scanned within a custom date range. See Apollos Tap.
Export your list to CSV
After searching or filtering, click the Export button to download the current list as a CSV file. The export includes everyone who matches your filters, not just the page you're viewing.
View a person's profile
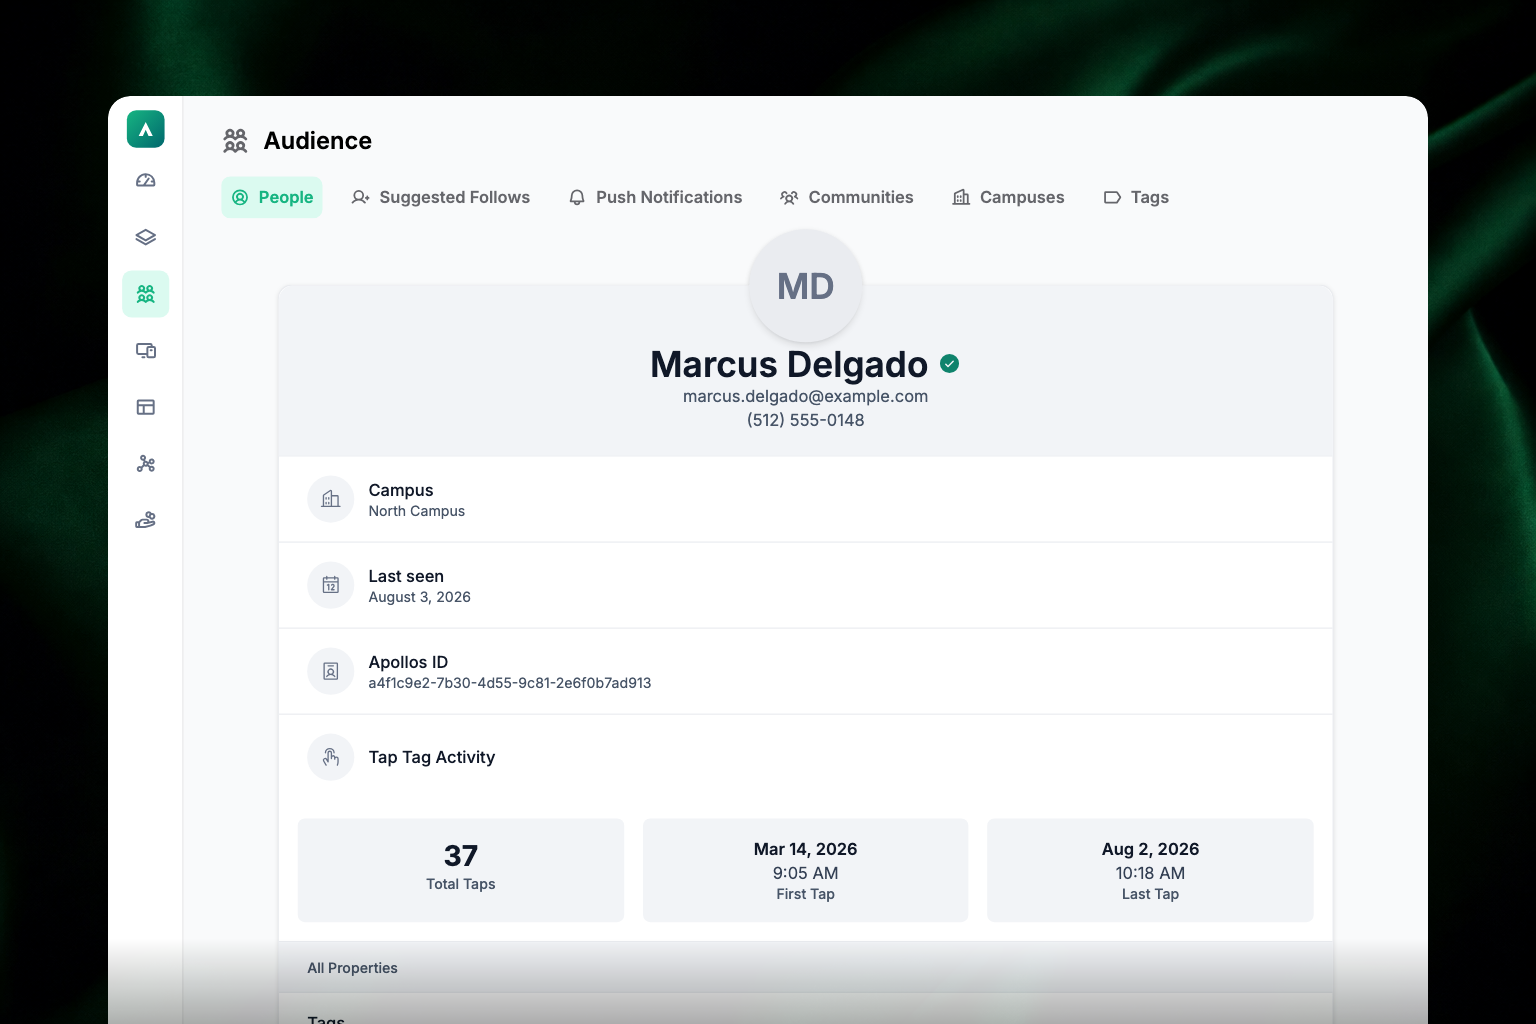
Click any person in the list to open their profile. You'll see:
- Name, email, phone, campus, and profile photo
- Whether they're an active app member, and when they last used the app
- Their Apollos ID, and where their record originated (with their ID in your ChMS, if synced)
- Tap Tag Activity — three tiles showing their total taps, first tap, and last tap
- Under All Properties: their tags, plus birth date, gender, origin, and when the record was created and last updated
The profile is a summary of who someone is, not a report on what they've done. It doesn't show Daily Habit completions, gratitudes, or prayer request counts — for engagement numbers, use the Dashboard.
Tag a person
Tags are the only piece of profile information you can change directly from a person's profile:
- Open the person's profile.
- Click the box under Tags and select the tags you want linked to this person.
- Click Save changes at the bottom right. It stays greyed out until you change a tag.
Tags control what personalized content this person sees in the app. To learn how tags drive personalization, see Personalization: tags & audiences.
Create a tag
- Open Audience > Tags.
- Click New Tag.
- Name your tag and click Save.
The Tags tab lists every tag with its origin — tags can be created in Apollos or synced from your ChMS. To assign tags to people, use the People tab (see above).
Manage campuses
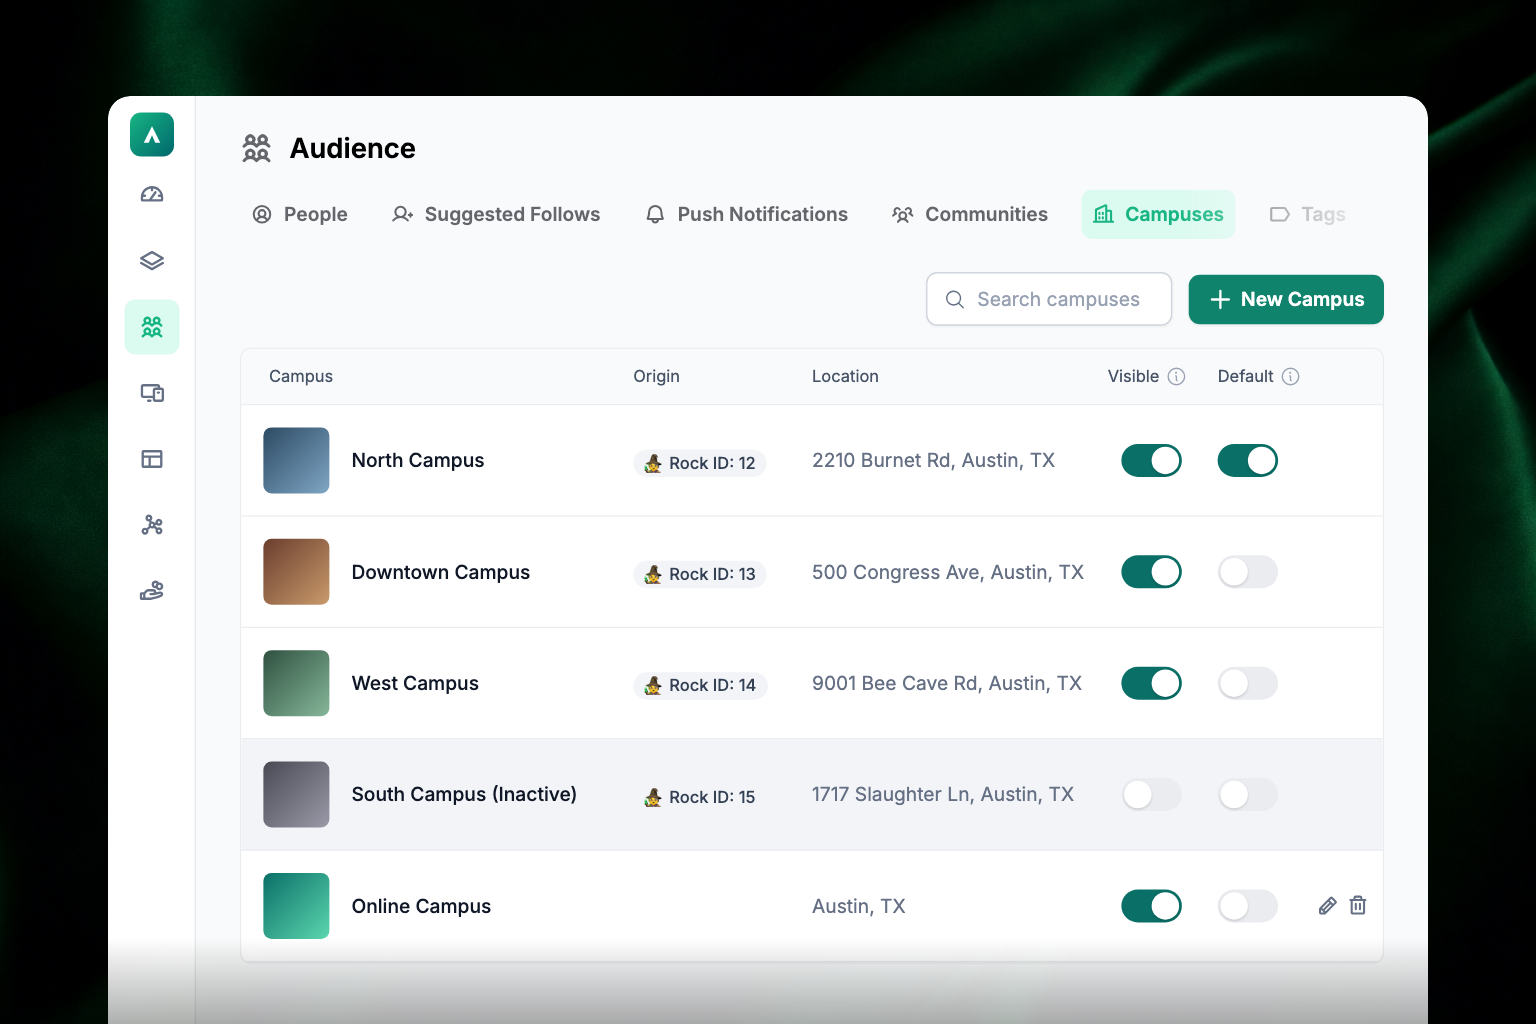
The Campuses tab lists your church's campuses, synced from your ChMS. When members create an account in the app, they're usually asked to choose a campus, and that choice can flow back to your ChMS. Members may also see campus-specific content (like events) based on their selection.
Two toggle columns control how campuses behave:
- Visible — whether the campus appears in the app's campus finder for members to choose.
- Default — the campus members are assigned to if they skip the campus question. Only one campus should be the default.
Campuses synced from your ChMS can't be edited here — manage them in your ChMS instead.
Restrict or remove a member
From a person's profile you can Ban or Mute someone, which limits what they can post and send in the app.
Deactivating an account and merging duplicate records are handled by Apollos — the controls are reserved for the Apollos support team, and they only apply to people who have actually signed in to the app. Contact support with the two records you want merged, or the account you want deactivated.
If you're seeing duplicates created by your ChMS sync, see Integration troubleshooting.
Troubleshooting
Why can't I find a person I know is in our ChMS?
Records sync from your ChMS on a schedule, so very recent additions may not have arrived yet. Check How data sync works for sync status. Also double-check spelling — search matches names and emails as typed.
Why does a person show no email or phone number?
The list only shows information the person has shared. Someone who signed up with just a phone number won't have an email on file (and vice versa) unless their ChMS record fills the gap.
Why don't I see the Audience section at all?
If the Audience tab is missing from your Admin navigation, contact Apollos support.