

Create, edit, publish & unpublish content
The Content section of Admin is where you write, organize, and publish everything your members see — and content you upload once is used across your app, TV apps, and website embeds.
How it works
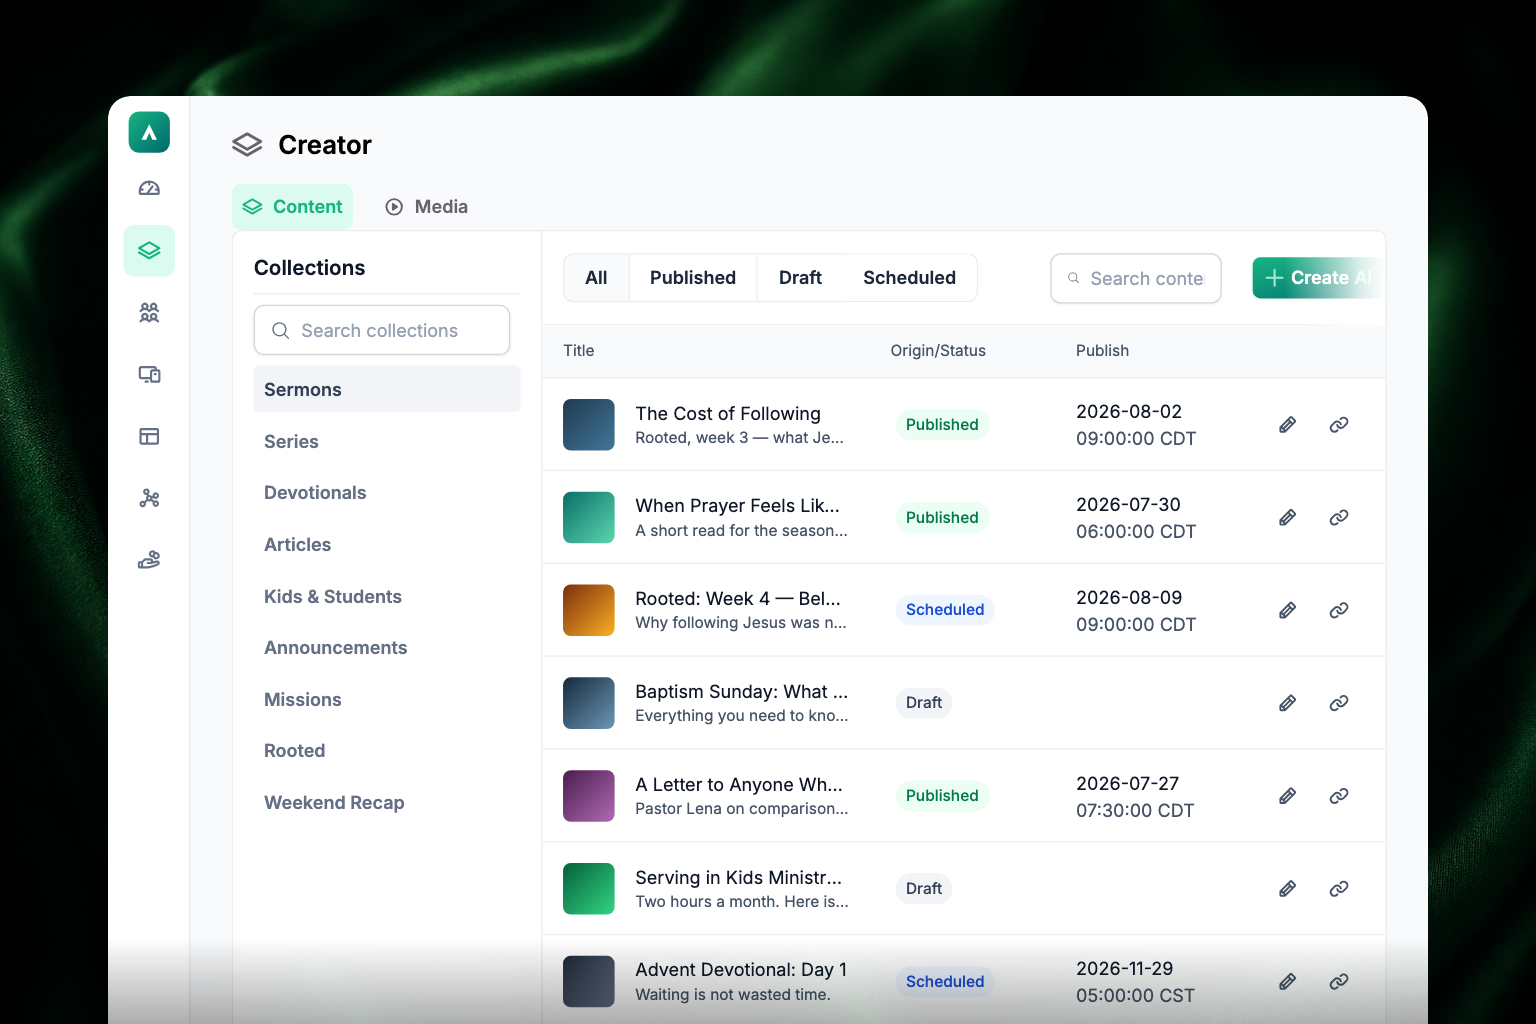
Open Admin and click the Content icon (the stacked-layers symbol) in the left sidebar. You'll see your whole content library, newest drafts first, with Collections in a panel on the left.
From here you can find content several ways:
- Browse the list — click a title or the pencil icon to open an item for editing. The chain icon opens sharing options (link, QR code, or open in browser).
- Search — type title keywords into the search bar at the top.
- Filter by status — use the All / Published / Draft / Scheduled buttons at the top.
- Browse by collection — click a collection on the left to see just its content. We recommend filing every item into a collection, since feeds pull content from collections.
Create a new piece of content
- In the top-right of the Content page, choose Create from blank (or Create AI to have Creator AI draft it for you).
- Add a cover photo: click Add Cover and upload from your files, a website URL, your camera, Google Drive, Dropbox, or Shutterstock. Pick an image related to the content — a series graphic, your church, or your team.
- Or add media instead of a cover: click Add Media and choose one of three options:
- Link — a direct streaming video URL (typically ends in
.m3u8) - YouTube — paste a YouTube link or video ID
- Audio — a direct MP3 URL (typically ends in
.mp3)
- Link — a direct streaming video URL (typically ends in
- Add a title.
- Write the body. You can type or paste text directly, or type / to insert a content block.
Content blocks
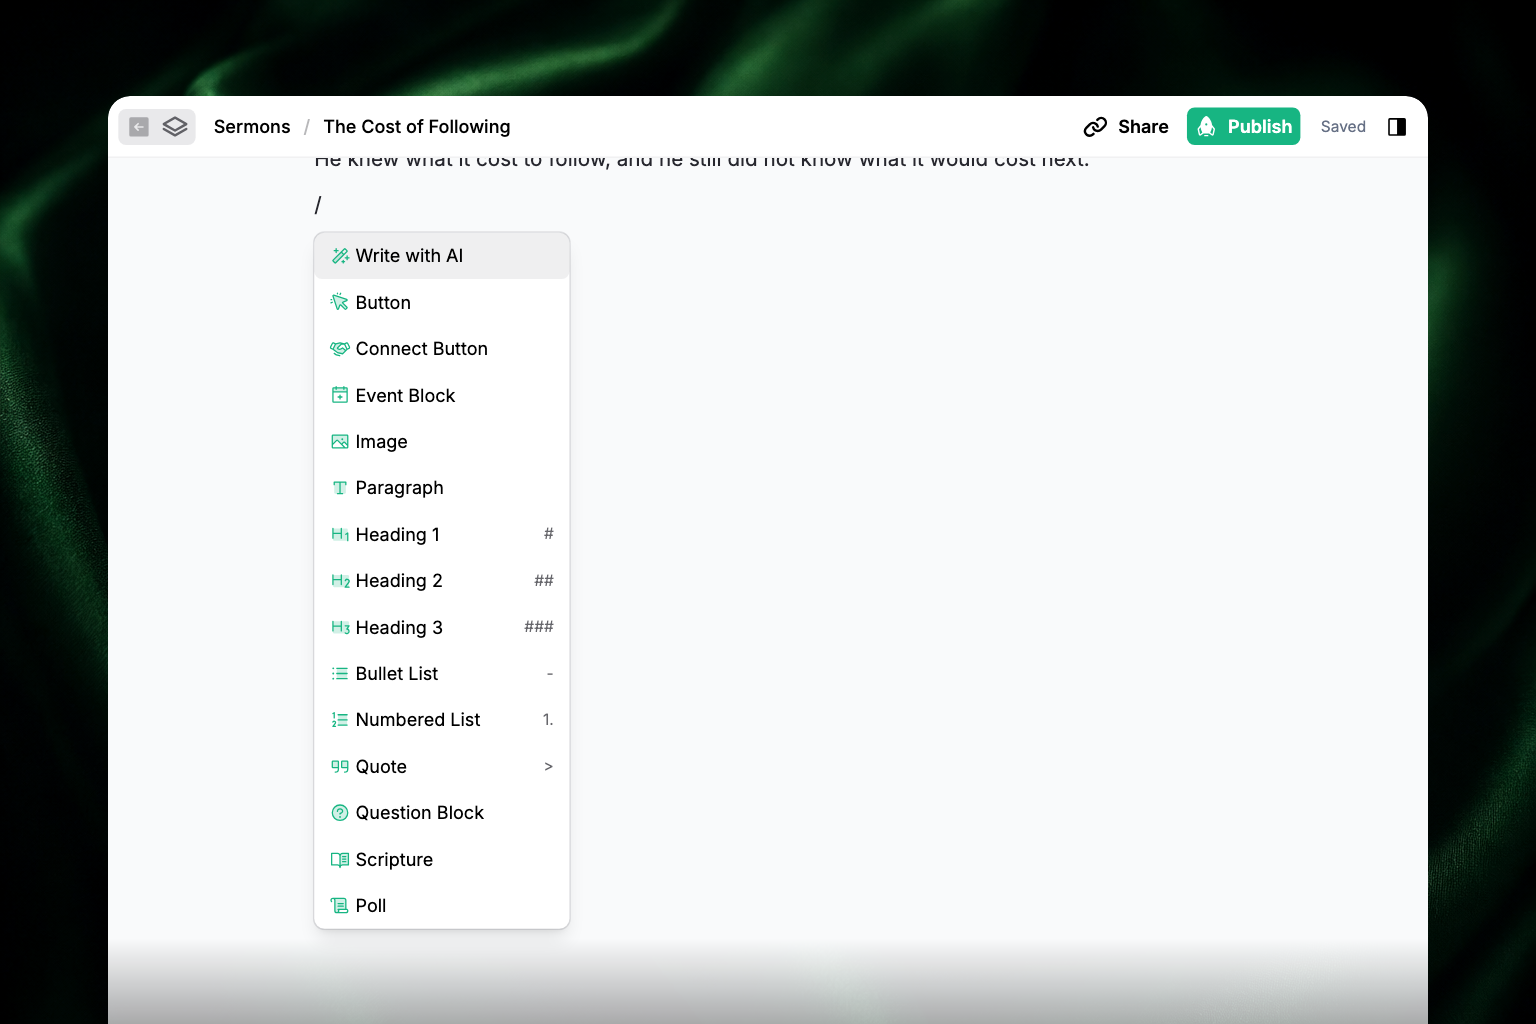
Type / at the start of a line in the body to open the block menu. The full list, in the order it appears:
| Block | What it does |
|---|---|
| Write with AI | Generates text from a prompt; you can Insert, Retry, or Discard the result |
| Button | A call-to-action button ("Register Now", "Give Online") with a URL; toggle whether it opens in the same or a new tab |
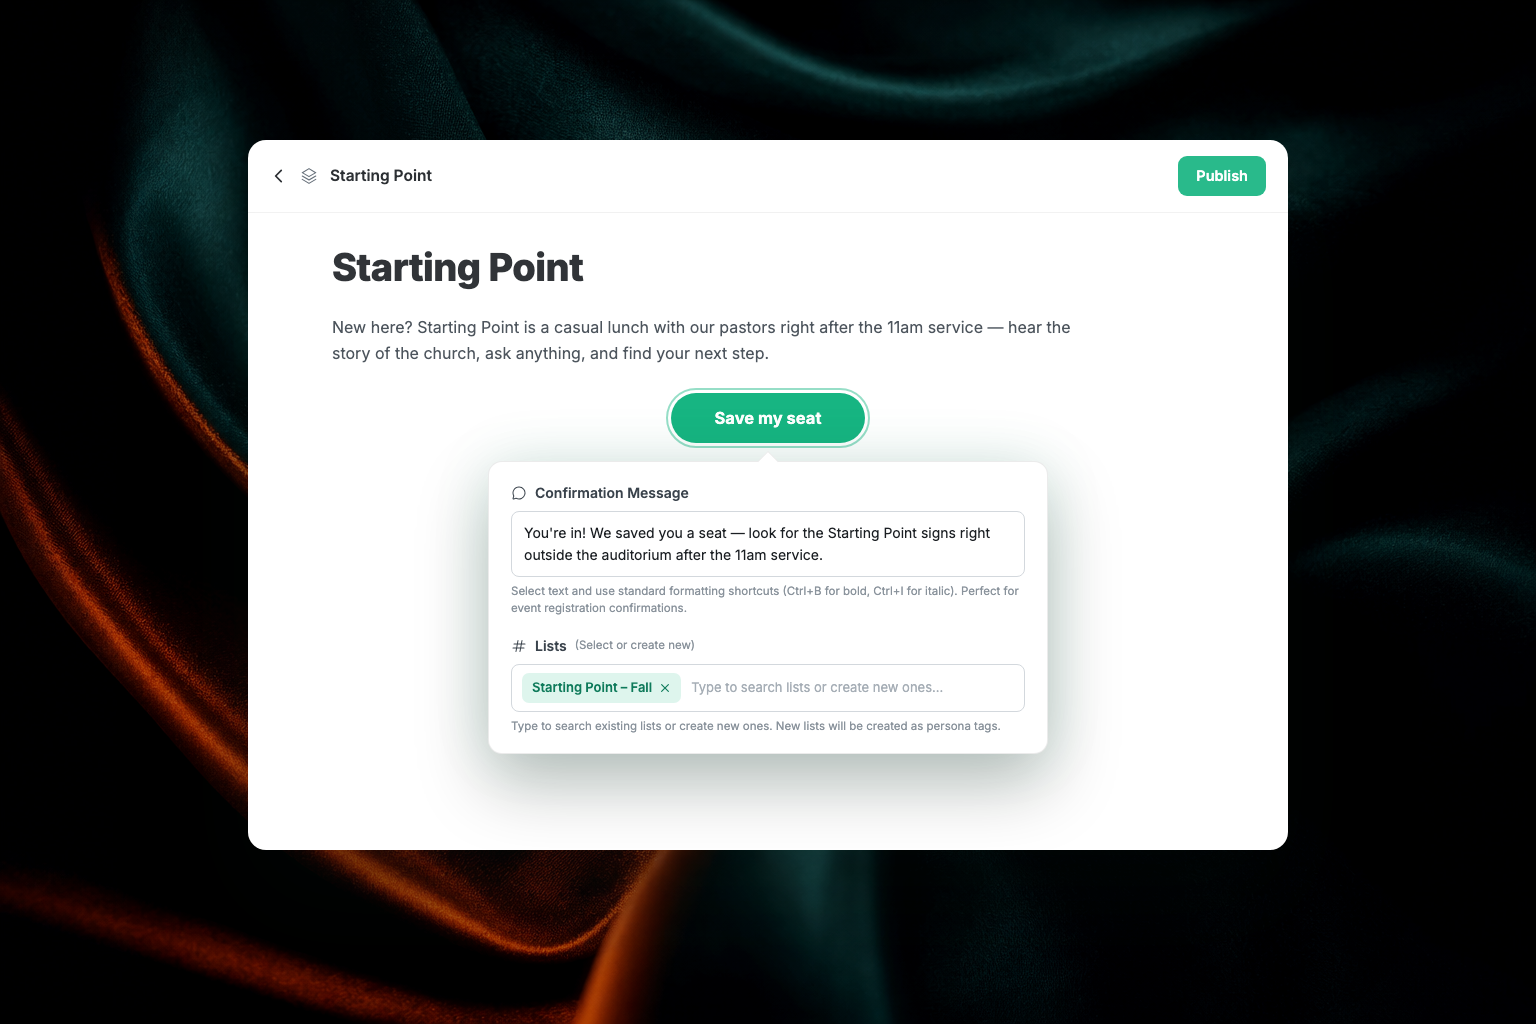
| Connect Button | A button that connects a member to your church — a next step, a sign-up, a form |
| Event Block | An event card with title, start/end time (or All Day), and a location. Members can add it to their calendar or tap the address for directions |
| Image | An inline image, uploaded from your device, a link, Google Drive, or Dropbox |
| Paragraph | Standard text; highlight it to format or add hyperlinks |
| Heading 1, Heading 2, Heading 3 | Structure your content with section headings |
| Bullet List / Numbered List | Lists, just like a word processor |
| Quote | An emphasized, set-apart quotation |
| Question Block | An interactive reflection or discussion question |
| Scripture | A formatted Bible passage block. Passages start collapsed at a fixed height with a fade at the bottom; short ones look complete because they fit, and members expand longer ones |
| Poll | A poll members vote in — see Polls |
The always-visible toolbar at the bottom-left of the editor holds the same blocks in submenus, plus undo and redo and an Insert Page button. One naming difference to know: the / menu calls it Question Block, the toolbar calls it Question.
To rearrange blocks, hover over a block, grab the drag handle on the left, and drag it to a new position.
When members respond to a Question Block, the app opens comments filtered to that question. The question stays pinned at the top of the comments drawer, responses do not repeat the same quote on every comment, and the composer says "Add a response" while the filter is active. Members choose the visibility for each response: Public, Followers, or Only you.
Publish content
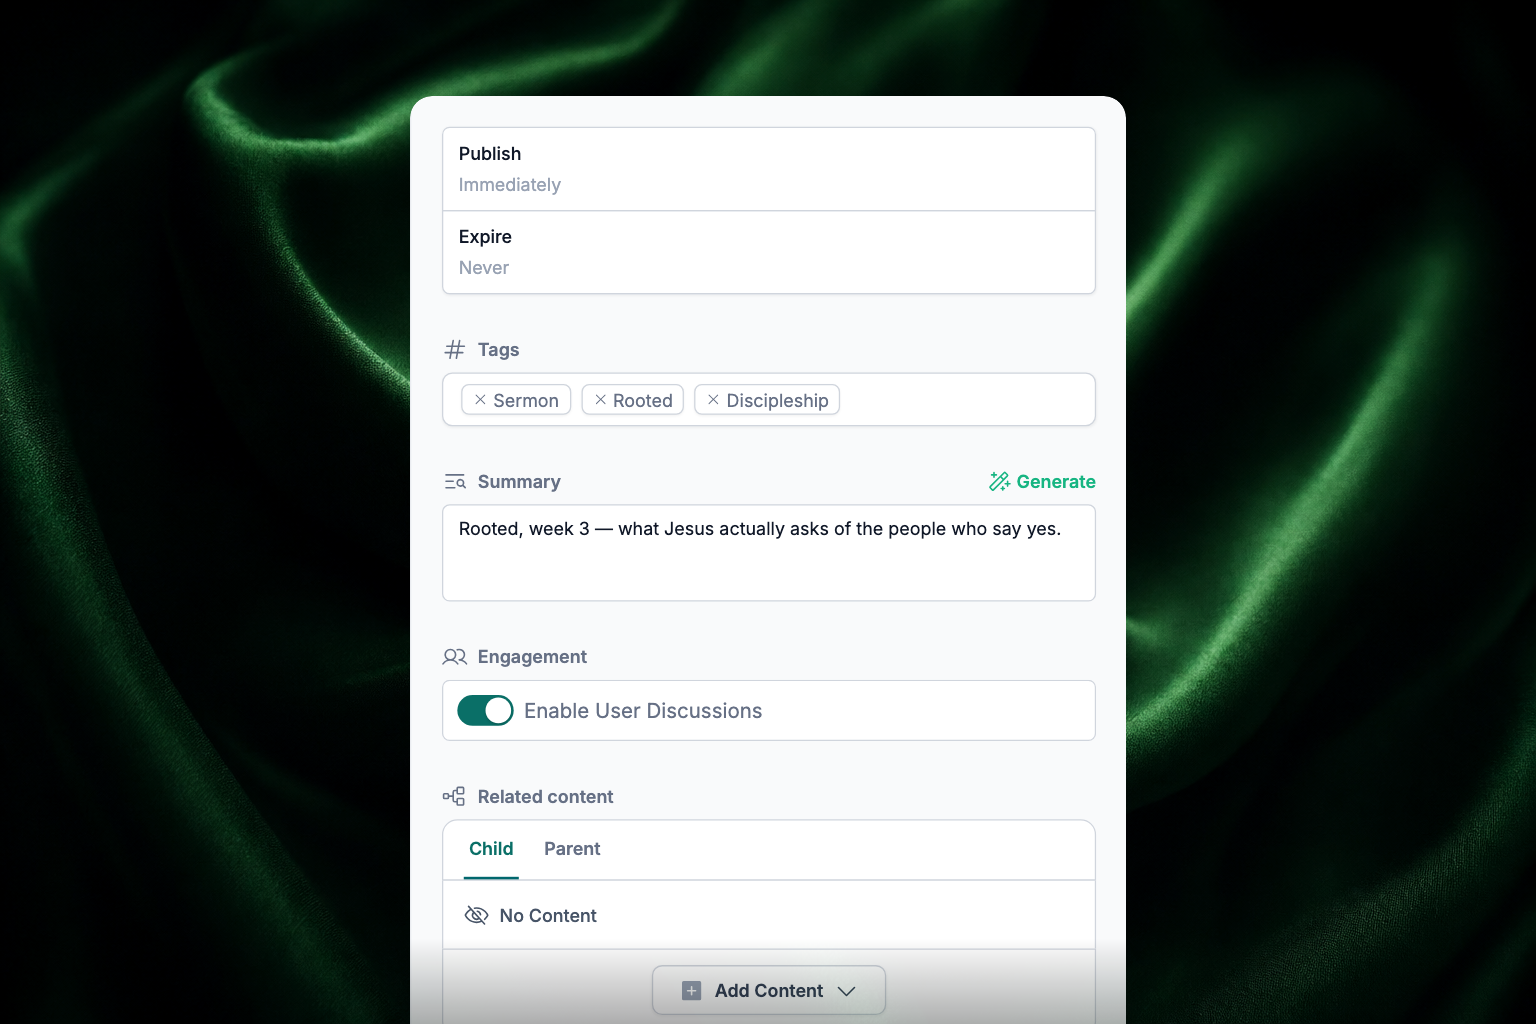
The panel on the right side of the editor controls how and when content goes live:
- Publish (date field) — schedule a go-live date and time, or leave it empty to publish immediately.
- Expire — set a date and time for the content to stop appearing in the app.
- Tags — tag the content by topic so members can filter by it and so personalization can target it. See Personalization.
- Summary — a short teaser shown on cards and link previews. Write your own, or click Generate (the magic wand at the right of the Summary heading) and let Apollos write it.
- Engagement — the Enable User Discussions toggle. When it's on, members see a comment section at the bottom of the content. This section only appears for churches with member engagement features turned on; if you don't see it, discussions aren't part of your plan.
- Related content — link this item as a child of a parent (for example, a message inside a sermon series) or add children under it. Linking an item as a child of a collection is the best way to file it so it appears in your feeds.
- Share — generate a link or QR code for the content.
One more section, Narration, appears in this panel only after the item is published. Use it to give members an audio version of a written piece.
When everything is set, click the green Publish button (top right). If the content belongs to a collection a feed uses, it appears in the app right away (or at its scheduled publish time).
Edit content
- Find the content on the Content page.
- Click the pencil (edit) icon.
- Make your changes — they save automatically.
While editing on the canvas, use the visible undo and redo controls to move backward or forward through your recent changes.
Unpublish content
- Open the content with the pencil icon.
- Click the Published button (top right).
- Select Unpublish. The content returns to Draft status and disappears from the app immediately.
Delete a piece of content
- Open the collection containing the content and click the item.
- Click the content's title at the top of the page.
- From the dropdown, select Delete.
- Confirm by clicking Delete in the pop-up.
Deleting content cannot be undone. If you might want it back later, unpublish it instead.
Delete a collection
- In the Content section, click the collection you want to delete.
- Click the three dots icon.
- Select Delete from the dropdown.
- Confirm by clicking Delete in the pop-up.
Deleting a collection also deletes all the content inside it, and it cannot be undone. Move any content you want to keep into another collection first.
Troubleshooting
Do I still need to enable these features in Organization Profile?
Link embeds, Web Embeds, eligible Webview tabs, the new editor, and polls are generally available. Their former Organization Profile switches have been removed.
Why isn't my published content showing in the app?
Check that the publish date is in the past, the expire date hasn't passed, and the item is filed in a collection that one of your feeds actually uses. For the full checklist, see Content troubleshooting.
Why can't I add a video with a regular website link?
The Link media option needs a direct streaming URL (ending in .m3u8), not a webpage. For YouTube videos, use the YouTube option and paste the link or video ID.
I deleted something by accident — can I get it back?
No — deleting content or collections is permanent. When in doubt, unpublish instead of deleting.